Friday, July 26, 2013

Pandan Chiffon Cake

Pandan Chiffon Cakes are widely sold aound Singapore. My all time favourite chiffon cake is still the Pandan flavour. First time that I baked with a perfect top layer with no crack lines. I have tried many other recipes and here's the recipe that I love very much as there's no food colouring involved, all the flavour of the cake comes from the pandan juice made from pandan leaves.


Sunday, July 21, 2013

Chocolate Nutella Chiffon Cake

Chiffon cake is a very light cake which don't require butter, only vegetable oil is used instead. As I still have a large bottle of Nutella chocolate spread, I was thinking I should bake something with Nutella instead. As I was browsing, I  came across Annchoo Journal Chocolate Nutella Chiffon Cake. The ingredients are pretty easy to source and the steps are very clearly stated.  Chiffon cake, like any other foam cakes, achieves a fluffy texture by beating egg whites until stiff and folding them into the cake batter. And I have learn from my client that Chiffon cakes tend to be lower in saturated fat than butter cakes.


Chocolate Nutella Chiffon Cake

Recipe Source:  Anncoo Journal

Ingredients

(A)
65g Hot Water
30g Valrohna Cocoa Powder
1 tbsp Nutella
1 tsp Vanilla Extract

(B)
4 Egg Yolks ( 70g each)
30g Caster Sugar
1/2 tsp Salt
  
(C)
50g Canola Oil
50g Fresh Milk

(D)
90g Plain Flour (Sifted)
10g Corn Flour

(E)
4 Egg Whites
60g Caster Sugar
1/2 tsp Cream of tartar

Methods

-  Mix ingredients (A), cocoa powder with hot water, add in 1 tbsp Nutella and mix till smooth, set aside.
-  mix (B) ingredients together in a large bowl, egg yolks, salt and sugar, the add in (C) canola oil and milk. The add in (A), cocoa mixture and mix well with a hand whisk.
-  Sift in (D) flour and corn flour and mix well.
- Beat egg whites with medium speed until you can see big bubbles, add in cream of tartar. Continue to beat until the bubbles become fine soft peak, gradually add in caster sugar and continue to beat until stiff peak. Change the mixer speed to lowest and continue to bear for 10 seconds. (this is to mimimize the air bubbles in the cake)
-  Gently fold 1/3 of the beaten egg white into the egg yolk batter, use cut and fold mehtod until well blended. Then pour the batter back to the rest of the egg white and fold until mixture is well blended.
-  Pour batter evenly into the ungreased chiffon cake pan. Gently bang the pan on the table top to release air bubbles.
-  Bake in pre-heated oven on the lower rack, 160 degrees for 35-40 minutes.
-  Remove from oven, invert cake onto table until completely cooled.

Enjoy

Tuesday, July 16, 2013

Nutella Popsicles

These cool treats are great on a hot day. It's simple to make and the creamy Nutella is not overly sweet too. All you need is just 2 simple ingredients which is Milk & Nutella Chocolate Spread and not forgetting the Popsicles Mould.  The moment I took out from the freezer, my sister dog was eyeing for these Popsicles. 


The ingredients for the Nutella Popsicles - Milk, Nutella  & Popsicles Mould.


Recipe Source : Anncoo Journal

Ingredients:

450ml Fresh Milk
4 heap tablespoon Nutella

Method:

- Blend the milk and nutella together with a hand whisk till combined.

- Stir the mixture as you pour into popsicle mould.
- Freeze them for a few hours or overnight.


.....Enjoy.....

Sunday, July 14, 2013

Topo Map Love Cake - Strawberry Flavour


This is my 2nd attempt baking Topo Map Love Cake. This time round, I decided to try a different flavour which is strawberry flavour using fresh strawberry puree. Overall am satisfied with the bake and the colour it turns out. The texture of this cake is soft and not dry too and taste so good. I liked the vibrant colour too. For recipe, you can refer to my previous bake  Topo Mad Love Cake. Instead of using the pandan juice, substiute with strawberry puree. Add a drop of red colouring if you want a more vibrant colour. 


Friday, July 12, 2013

Topo Map Love Cake (地图牛油蛋糕)

When I first saw this cake , I was fascinated by it's colour & irregular stripes. I decided to bake this pretty Topo Map Love Cake and could not wait to see how my cake turns out after baking. My sister's dog came lingering at the kitchen  the moment I took out the cake from the oven. I was happy to see the outcome of this cake. In fact it's a simple nice butter cake which look like a map and is now my favourite too.


   Topo Map Love Cake (地图牛油蛋糕) 

Recipe  Source:      Eileen's Diary  /  Table For 2.....or More

Ingredient
  • 150g unsalted  butter (softened at room temperature)
  • 90g Castor Sugar
  • 3 eggs
  • 180g self raising flour, sifted
  • 75g evaporated milk
  • 1 tsp vanilla extract
  • 1 tsp pandan flavour concentrate ( I used Pandan juice)
  • 2 tbsp chocolate powder

Method
  1. Cream butter and sugar until pale and fluffy.
  2. Beat in eggs, one by one, beating well after each addition.
  3. Sift half the flour into the butter mixture and beat on low speed until well combined.
  4. Mix in the evaporated milk until well combined.
  5. Sift the balance of flour into the mixture and beat on low speed until combined.
  6. Divide the batter to two. Mix vanilla extract to one part and pandan paste to the other.
  7. Preheat oven to 170 degrees
  8. Spread 1/2 the pandan batter (or vanilla whichever you prefer) into pan. Level it.
  9. Evenly sift a thin layer of cocoa powder over.
  10. Very very gently dollop half of the other colour over and gently level it. Repeat the sifting of cocoa powder.
  11. Repeat layering with both colours, with the final layer clean (no cocoa powder on top).
  12. Bake for 45 minutes or until toothpick comes out clean.

Sunday, July 7, 2013

Castella Cake (蜂蜜长崎蛋糕)

Castella is a popular Japanese Sponge Cake made of flour, sugar, eggs, milk and honey. Though simple, tastes awesome and is not an easy recipe to attempt. Though the cake contains no butter or oil, the texture is still very moist. The moistness can only be achieved by refrigeration the cake overnight.

I was mesmerized by the look of this Castella fine texture while browsing through Helena's Kitchen  and the fact that it uses a wooded mould to bake. As I don't have a wooden mould, I tried baking it with a normal baking tin. Suprisingly it works. I will attempt baking this again, hopefully I can get the wooden mould soon.

Another thing to take note is this cake need a really sharp knife to cut. I have to constantly wash the knife to get rid of the stickiness so that the cake can be cut nicely.


 Castella Cake (蜂蜜长崎蛋糕)

Recipe Source: Helena's Kitchen

Ingredients:

4 whole eggs ( separated & room temperature
3 tbsp honey 
2 tbsp milk
1 tsp maltose sugar ( very important, it makes the texture of the cake look nice, moist & smooth)
120g bread flour
75g caster sugar)
1 tbsp mirin (optional)

Directions:

1.  Preheat oven at 160C. Fill 2 little loaves pans with water. Fill up 1/4 of the pan. Place them into the oven and place each pan on both sides of the pan so that the cake batter will be in the middle fo the 2 filled pans with water.

2.  Put milk in a bowl and microwave for 10 seconds to warm. Stir in maltose sugar, honey & mirin until well melted and incoroporated.

3.  In a large mixing bowl, beat egg whites till soft peak, Then, slowly add in the sugar. Beat until stiff peak and the egg white batter will becomes thick and glossy.

4.  Next beat in egg yolks, one at a time. Beat well until mixture turns to a pale whit colour or approximately 5 mins. ( or fill the batter in a 100ml container,the batter should weigh around 23-25g).

5.  Swith your mixer to the lowest setting, Then add shifted flour slowly until mixture well incorporated.

6.  Then, slowly pour the warm honey mixture into the batter until well mixed. Using a sifter, pour the batter into it and into the pan. Gently drop the baking pan on the bench top to minimize air bubbles.

7.  Place pan in between the two filled pans with water. Baked for about 60 mins or until golden brown.

8.  Once the cake is done, remove from oven, place a non-stick parchment paper on top of the cake and follow by another cake pan, turn up side down the cake. Cool on a wire rack.

9.  When the cake is cool enough to handle but still warm (about 15mins), invert the cake again, remove the pand and wooden box. Continue to cool on a wire rack.

10. Once cake is cooled, wrap nicely with paper and film. Refrigerate overnight. (This step is critical to ensure the Castella has a moist texture).

* I don't have a wooden tray so I used a normal  baking tin instead.


Friday, July 5, 2013

Kopitiam Milk Buns

Kopitiam Milk Buns is a simple and comforting food for breakfast or for afternoon tea breaks.
I love having this kind of Milk Buns spread with Butter for breakfast over a cup of hot coffee or have it in my afternoon tea break chatting together with friends. This is my first attempt baking this and am quite happy with the bake.


Kopitiam Milk Buns

Recipe Sources:     Eileen's Diary   copycakekitchen   crystal 

Ingredients

A: Sponge

214g Bread Flour
128g Cold Full Cream Milk
2g Instant Yeast

B: Dough

92g Bread Flour
12g Cold Full Cream Milk
30g Egg
7g   Instant Yeast
5g   Salt
61g Sugar
12g Milk Powder
45g Butter

Method

1.  Preheat oven at 160C
2.  Mix ingredient A for 3 mins on 1st speed.
4.  Ferment at least 4 - 5 hours or keep in fridge 12 - 16 hrs overnight.
5.  Mix the sponge, dry ingredients & liquid mix on 2nd speed until like a dough.
6. Then add in butter, continue to mix until the dough is fully developed.
7.  Divide into 50/60g portions and arrange into the baking pan.
8.  Proof for 1 hour or until double size.
9.  Bake for 20 mins or till golden brown.
10. Remove from pan immediately and leave on the cooling rack.


Tuesday, July 2, 2013

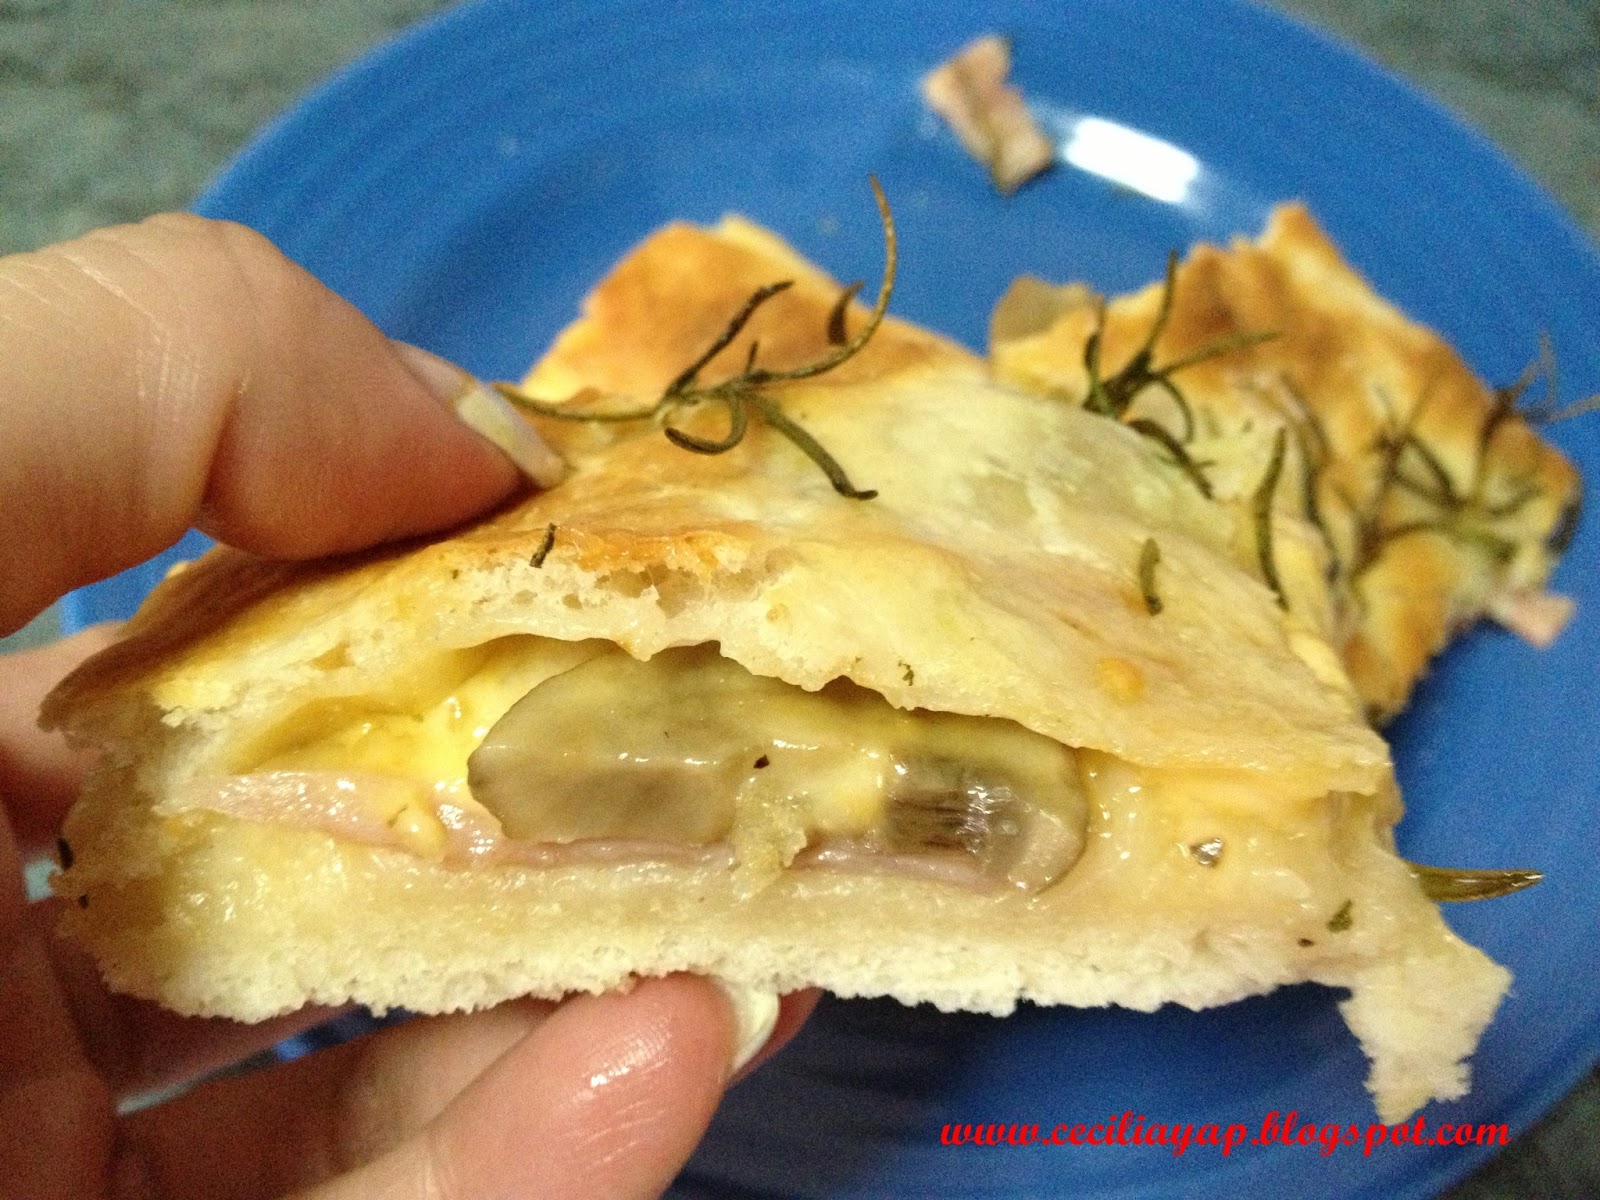
Ham Cheese & Mushroom Focaccia

The word Focaccia refers to a type of Italian yeast bread baked in a flat pan. It is a very popular snack in the Italy. It can be eaten as it is or sliced and used for making sandwiches. I personally enjoyed eating Focaccia bread dipped with olive oil.


     The ingredients for the Focaccia Bread using my home grown Rosemary.


Ham Cheese & Mushroom Focaccia

  Recipe Source:  jessie-cookingmoments 

Dough Ingredients:

250g Bread Flour
10ml Olive Oil
4g Instant Dried Yeast
2g Salt
150ml Water

Filling Ingredients

200g Guyere Cheese, thinly sliced ( I used Morazalla and Shredded Cheese)
150g Shredded Ham
90g Fresh Cup Mushroom, thinly sliced
1 tsp Dried Thyme
Some Cracked Black Pepper

Topping Ingredients

15 Small Sprigs Fresh Rosemary
2 tbsp Olive Oil
Some Sea Salt

Method:

1.  For the dough., mix all the ingredients, using a dough hood to knead  for about 20 minutes and let it proof for an hour. I did not use the breadmaker. Spray the top with some water at the beginning of the proofing.
2.  When the proofing is complete, divide the dough into 2 equl portion, about 200g each. Oil the Pryex dish & fingers. ( I used baking tray instead). Stretch out 1 dough.
3.  Arrange the ham on top, followed by the mushroom, dried thyme & cheese. Sprinkle with some cracked black pepper.
4.  Oil the fingers again & stretch out the other half of the dough, cover on top of the cheese. Let to proof in a warm place until double it's size. It took me about an hour to do the proofing.
5.  When it is ready, oil a finger & make dimples on top & press in the sprigs of rosemary. Drizzle some oil over the top of the dough. Sprinkle with some sea salt.
6.   Instead of  spraying some water in the oven to create steam. I placed a bowl of hot water inside and bake in a 180C preheated oven for 25-30mins or until the top is golden & crisp.